Make Your Own Soap
Basic Soap Making Tutorial That Anyone Can Follow
Monday, October 24, 2016 10:30
Soap making is not as hard as you think. Although it might sound complicated, it’s a skill our ancestors took for granted.
The pioneers and trailblazers of the west knew the value of cleanliness, and the value of knowing how to make their own soap. Soap destroys germs, prevents bacteria from thriving, and contributes to our overall health. It is also something that every family needs, and it’s surprisingly straight forward to make.
Making Green Tea and Lavender Soap
Soap making is a skill. Once you learn a skill you will always have it. You can make soap instead of buying it and give it as a gift, use it for barter, or use it for yourself. Once you know the basic method and recipe for crafting soap, you can vary it, adapt it, and turn out your own fun soapy creations. Hand-soap is not the only possibility for home soap making; beauty bars, spa bars, and even laundry soap are all just variations on the basic recipe.
Now let’s look at what is involved in soap making. The basic formula for soap is: lye + water + fat = chemical reaction creating soap. Of course, techniques, tactics, and ratios are also involved. So, let’s break this down.
Lye: Precautions, Cautions, and Safety
Soap making requires lye, either sodium hydroxide or potassium hydroxide. I used a solid granular form of sodium hydroxide for this recipe. You will want a “food grade” rather than cleaning grade lye for soap making.
Note: While we are working with a caustic for this, by the time your soap is mixed and aged for 24 hours, there will be no residual lye left. Lye is an ingredient, but it is completely used up in the chemical soap-creating reaction.
Lye is highly caustic so keep it, green soap, and your soap making utensils away from children and pets (and careless family members).
When working with lye, always observe the following precautions:
Work in a well-ventilated room or outdoors. If you are working in a room, work in front of an out-door window and have a fan pointing out to vent the lye fumes away from you.
Wear gloves, a dust mask, and eye protection when doing anything with lye. This includes measuring it, adding it to the tea, adding the lye liquid to the fat, and stirring the blend. You may also want to wear older clothing, specifically a long sleeved shirt, in case of lye splashes while mixing the green soap.
Keep white vinegar on hand to neutralize any splashes of the lye liquid or the green soap. I prefer keeping lye contained, so I work in the kitchen sink. Always wipe down your work area with a vinegar-dampened cloth after you have worked with the powdered lye. This will prevent unintentional chemical burns later on.
Tools for Soap Making:
A Mold – This recipe is designed to fit into a small-sized plastic shoe box.
Parchment Paper – Use a piece of this to line the mold. Fold and staple the corners to make a secure lining.
A Scale – Use a gram scale or kitchen scale. You need something that will give accurate measurements and be able to handle the full weight of your oils.
Containers – Make sure you use non-reactive (clay, enamel, glass, plastic, or stainless steel) containers. I use glass Pyrex dishes for measuring oils, preparing the lye, and mixing the soap.
Utensils – I use metal spoons to assist with oil measurement. To stir lye, I use disposable wooden chopsticks. NEVER use a metal utensil in lye.
An Immersion Blender – Find one that doesn’t splash up, and have an attachment specifically for soap making. You can blend the fats and lye with just stirring, but it is more predictable with the blender.
A Spatula – I like the silicon spatulas and have one dedicated to soap making.
An Extra Pair of Hands – Preferably wearing gloves. Two pairs of hands are essential when pouring your soap from the mixing container into your mold.
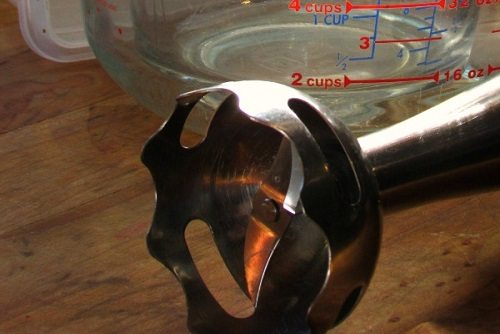
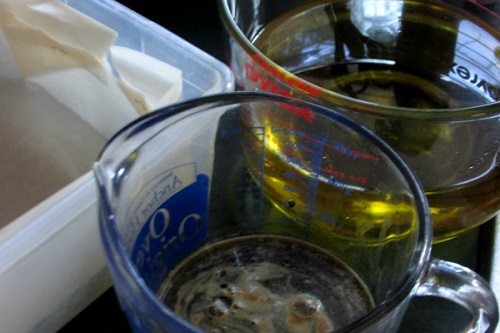
Measuring Cup and Blender
Green Tea and Lavender Soap Recipe
Ingredients:
- Green Tea, slightly warm – 250-375 millilitres (1 – 1.5 cups).
- Lye / Sodium Hydroxide crystals – 148 grams.
- Coconut Oil – 470 grams.
- Olive Oil – 350 grams.
- Hemp Oil – 180 grams.
- Lavender essential oil – 2 teaspoons. (Make sure to use a natural essential oil. Fragrance oils or perfumes can react unpredictably with your soap, and can cause lye pockets, or challenges with the saponification.)
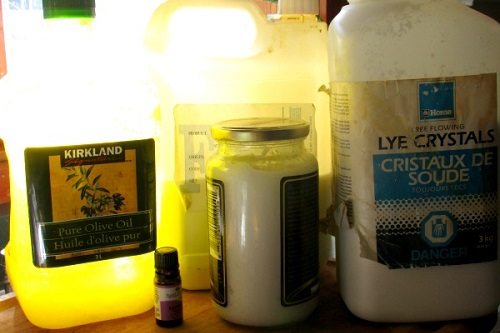
Soap Making Ingredients
Instructions:
Step One – Start by steeping your green tea. Use 5 tea bags in about 2 cups of water. You’ll do a more specific measurement before adding the lye, this just makes sure you have enough since the tea bags will absorb some of your water.
Step Two – Measure out your oils. Solid oils are easiest to measure first, followed by the liquid oils. Measure your oils, then pour them into a container that you can heat.
To measure liquid oils, put a container (like a measuring cup) on your scale and tare out the weight. Then pour in the liquid oil until you reach the right amount. You may have to do a little fine tuning with a teaspoon to get the oil exactly right. You can be a gram or two over on your weight of oil, but try not to be under the recipe weight, or more than 3 grams over per oil.
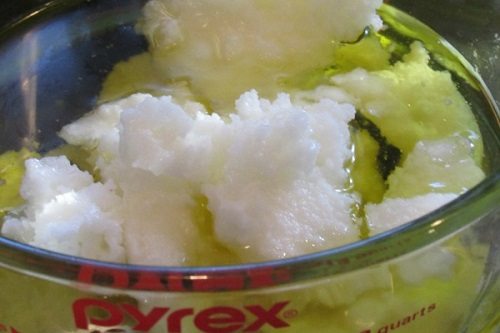
Measuring the Oils
Step Three – Set your oils some place safe to warm up and melt. If you are using glass, a good place is on top of your stove while you have something baking (like a roast). You want your oils at approximately 140F. If you place your hand on the outside of the container it should be pleasantly warm, not scalding hot. If your oils get too hot, let them cool while you prepare the lye.
Step Four – Pour 250-375 ml (about 1.25 cups) of your green tea into a non-reactive glass container. Place a flat plate or container on your scale and lay a paper towel over it. Put on your protective gear and make sure your vinegar is handy.
Step Five – Carefully pour out your lye granules onto the scale until you reach 148 grams. Make sure to firmly cap the lye container when you put it aside.
Using the paper towel under your lye grains, carefully pour them into the green tea. Carefully shake off the last of the lye granules, and discard the paper towel in the nearest safe garbage can. Lye can linger on the paper, so make sure to safely discard it.
Remember: NEVER add water to solid form lye. Doing so can cause explosions and/or chemical burns.
Grab a chopstick and carefully stir your lye and liquid mixture. Making sure your liquid is slightly warm at the start will speed up the lye dissolve reaction and help prevent lye from crystalizing on the bottom of the container. Once the lye reaction begins, any crystals on the bottom of the bowl should blend in. Stir until you no longer feel crystalized lye on the bottom of the container.
Step Six – Let your lye cool down to just over body temperature, 100-140F. The lye solution and the liquid oils and fats should be roughly the same temperature. Oils should be slightly warmer than the lye. If the lye is in front of a window, this won’t take as long as you might think. If your lye gets too cool, you can put warm water into the sink around it and re-warm it. Just don’t splash extra water into your lye.
Step Six and a Half – Get your essential oils ready at this point, and make sure your mold is ready and lined. 2 teaspoons of essential oil is 10ml. If you have a 10ml bottle of lavender, or your E.O. of choice, just remove the dropper insert, re-cap, and keep it handy.
Oil, Lye, and Mold Ready to Go
Step Seven – When the lye and the fats are the same temperature, or when the fats are just slightly warmer than the lye, carefully pour the lye mixture into the liquid fats and oils.
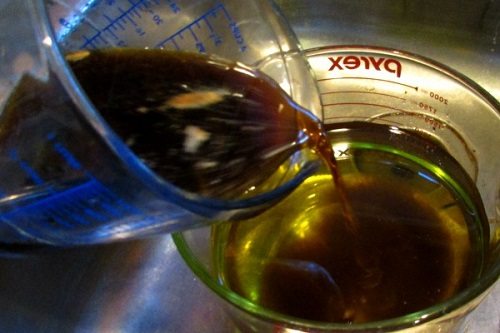
Adding Lye to the Oil
Step Eight – Stir the two together with your immersion blender. Move carefully from top to bottom and bottom to top, side to side, and back and forth. You don’t want to start a whirlpool, or splash everywhere, but you do want everything to be thoroughly blended.
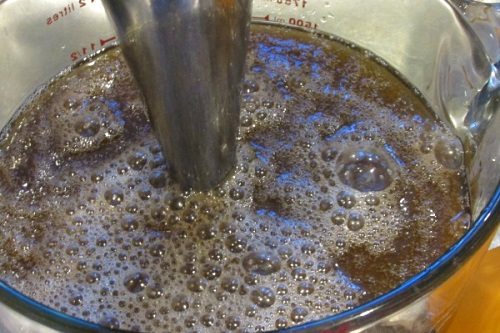
Starting to Mix
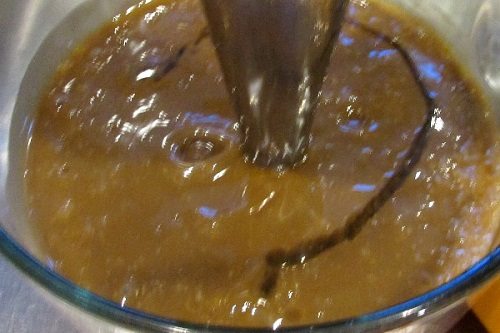
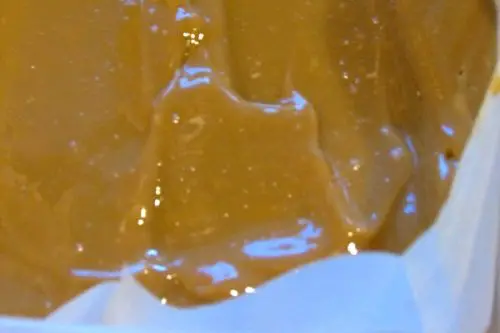
As you are blending, the green soap mixture will gradually change and start to thicken. When it is the consistency of cooked custard and leaves line on top, it has reached the point of “trace.” Add your essential oils as soon as trace is reached, and blend them in.
 203
203
Just Added Essential Oils
Step Nine – Take your at-trace soap mixture, and your mold, and pour the soap into the mold. An extra pair of hands is helpful to scrape all the green soap out of your mixing bowl and into the mold. Don’t forget to scrape your blender too.
Soap Poured Into the Mold
Step Ten – Put a light lid on your mold and wrap in towels. Set your mold aside, flat, in an undisturbed place for 24 hours, or until it is no longer hot to the touch. During this time the saponification takes place.
The saponification reaction, when the ratios are correct, completely removes all trace of lye. After 24-48 hours the soap will no longer be caustic and can be handled with bare hands.
Clean Up: Wear gloves, and use plenty of dish soap and water to clean up your lye and soap making containers. Wipe down your work area with a paper towel dampened in vinegar to make sure there are no stray lye splashes (also, wipe down any area you touched with your gloves on). I prefer washing soap-making dishes and utensils twice. Once to get off the green soap, and the second time to make sure there is no residual oil or lye.
Step Eleven – After 24 hours, you can unmold the soap and cut it into bars. You may want to trim the ends and edges before cutting. This batch will make 12, 3 ounce bars. Place your cut bars on a breathable tray, and let your soap age. After 2 weeks, you can put your bars in packaging or boxes for storage.
Always cut soap within 48 hours of making, otherwise it may become too hard.
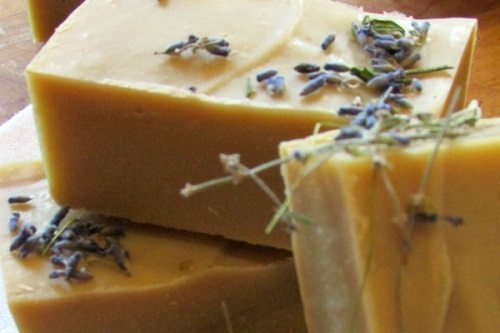
Finished Soap Bars
Step Twelve – After your soap has aged for 2 weeks to a month, grab a bar of your awesome homemade soap and give it a trial run!
Soap-Making Variations
The easiest way to vary your soap is to change what essential oil is being used. You can use single oils, like lavender and peppermint, or you can use a combination of oils like lavender with rose geranium or cedar with sandalwood.
If you want to make milk soap, you can use either goat’s milk or cow’s milk. Sub out half the required liquid, and freeze that amount of milk. Mix the lye with the water as before, and then carefully place your frozen milk in the container. The frozen milk will change the color of the lye, it will also cool the lye down faster.
If you want a bar that is deodorizing, add a quarter cup of ground coffee at the trace stage. Coffee soap will both deodorize your hands and remove difficult grime like motor oil. Oatmeal can be added instead of coffee for a milder exfoliating beauty bar.
If you want to substitute oils and fats, you’ll need to recalculate the recipe as different oils saponify (turn to soap) at different rates and require different amounts of lye. A lye calculator is also useful if you want to create larger batches.
If you’re doing a variation with solid fat like hydrogenated vegetable oils or tallow, you will want to use a stainless steel pot to melt your oils and fats together. You can do this melting on the stove top; just make sure your oils don’t get too hot as they could spontaneously combust. Different oils have different characteristics in soap. Here’s a breakdown of some of them.
Trouble Shooting
Soap making is a chemical reaction, and as such, it is not always as predictable or convenient as we would like. Too much fat, and your soap will be soft and greasy. Too little fat, and you may end up with pockets of lye and other difficulties.
When you unmold your soap, watch for liquid on the underside or sides of the soap brick. If the liquid is oily, this can be extra fat, but if it resembles water it is liquid lye. Wear gloves if there is any extraneous liquid on your soap. Use paper towels to mop up the liquid, and then make sure to discard the paper safely. Soap with extra liquid will need a bit longer to age before you use it.
Sometimes the soap will end up having small pockets with a crystalline appearance. These are pockets of lye. Soap with lye pockets should not be used on your skin. However, it can be grated (wear gloves), melted with water on your stove, and turned into soft laundry soap. This melting process will recombine and neutralize the lye pockets. Alternatively, you can also re-batch it.
All these precautions, and working with a caustic, can make soap making seem scary. But in reality it is very straight forward. Start to finish, a batch of soap takes about four hours. It can be completed in a single afternoon, not counting the aging process. Even if you are very particular with the type of soap you like, once you understand basic soap making you can make a bar that is exactly the way you want.
Soap making is a skill, and like any skill, the best way to learn it is to start. Start with the above recipe, then if you enjoyed the process, use the lye calculator to invent your own recipes and variations. Remember, learning skills means you always have them, no matter what.
We are straying away from our roots on a dangerous road from which there will be no turning back. And the good and bad news is that we are the last generation that can truly do something about it.
We no longer know how to live without refrigerators, without cars, without phones or without supermarkets.
What will you do tomorrow if you simply are unable to buy things?
Find all the answers in this great book ‘The Lost Ways‘ . Learn the lost ways of our ancestors!

http://www.bioprepper.com/2016/03/29/basic-soap-making-tutorial-any...
Comment
"Destroying the New World Order"
THANK YOU FOR SUPPORTING THE SITE!
Latest Activity
- Top News
- Everything
Prince - Cinnamon Girl (Official Music Video)
"Cinnamon Girl" from 'Musicology' (2004)☔️ Listen to more Prince here https://lnk.to/PrinceStream📺 Watch all the official Prince videos here http://bit.ly/P...
Hooray for Russian TV
".Supposedly, Russians have evidence that links Burisma and the recent terror attacks. Burisma for…"
True Story
"Well I bet Iran remembers that true story. ~ and there in lies the problem...because they would…"
Hooray for Russian TV
" That one is a shocker! even for them. What could have driven and compelled them to dredge up…"
It Wasn't Fauci: How the Deep State Really Played Trump (mini-doc)
"Excellent video. I hope this one makes it to the features page it sure deserves it. Answers a lot a…"
Governor Signs Climate Engineering Ban Legislation Into Law
https://www.GeoengineeringWatch.orgTo support Geoengineering Watch: http://www.geoengineeringwatch.org/support/Contact us: Dane Wigington, P.O. Box 9, Bella ...
© 2024 Created by truth.
Powered by
![]()
You need to be a member of 12160 Social Network to add comments!
Join 12160 Social Network