How to Build an Igloo
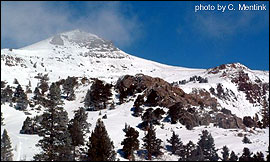
During the winter season, a companion and I spent two nights in an igloo near Carson Pass, California. At 8,570 feet the snow was too deep for hiking without snowshoes, and night temperatures dipped to minus five degrees Fahrenheit. Despite the cold, we kept relatively warm in our igloo. I learned to make igloos from Kim Grandfield's Snow and Igloo classes at Sunrise Mountain Sports, not from an Inuit elder. If you have an opportunity to watch and participate in building an igloo with someone who knows the process, that is the best way to learn. Having said this, I'll do my best to provide a description of the process I have found successful.
MATERIALS NECESSARY:
- Snow saw, 14-20 inches long
- Snow shovel
- Waterproof gloves or mittens
- Snowshoes may be needed to access site
Most people have seen pictures of the domed snow block structure known as an igloo. The Inuit also built far more complex snow block structures, but the small domed house most of us have seen in cartoons and movies is a structure which can be constructed in an afternoon.
Construction begins with the cutting of snow blocks. In most areas snow falls without compacting enough to allow 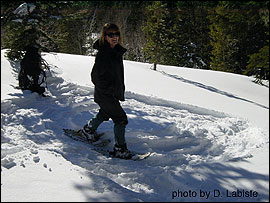 blocks to be cut. Tramp an area the size of your intended snow block quarry for at least 15 to 30 minutes, then let it rest a half hour. Compaction causes the small ice crystals of snow to melt. These quickly refreeze, forming a more solid building material. The size of the blocks you cut will depend upon two things:
1. How heavy a block are you able to comfortably handle? Your strength and the moisture content of the compacted snow will provide some practical limits to the size of the block.
2. How strong is the compacted snow? In areas where layers of snow have thawed and refrozen, there may be ice layers in the snow. These layers make the snow blocks fragile. If such blocks must be used, they will have to be thicker than those cut from blocks without ice layers. Well compacted, low moisture snow can be cut into large thin blocks.
Your quarry may be the area over which the igloo is built. With this plan the quarry forms the floor of the igloo. The floor of the igloo is below ground level. Since entry ways are best set below the level of the igloo floor, further excavation forms the entryway. Planning your igloo site on a hillside facilitates this process.
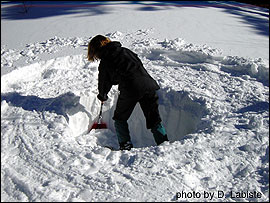
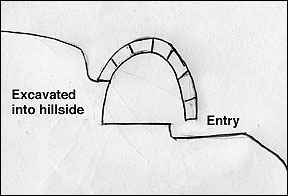
If a number of people are helping to build the igloo, using the floor as the quarry may cause too much congestion. A nearby quarry will work better and the floor can be quickly excavated with a snow shovel.
Regardless of where your quarry is situated, you will need the snow shovel to excavate a hole or trench. This is the only way to reach the underside of the first blocks to cut them free.
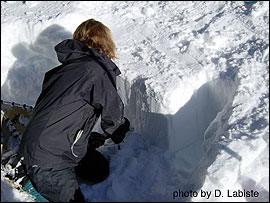
Cutting the underside of the block with the snow saw.
Once blocks are cut, construction begins as an upward spiral. When building on a hill, the slope of the hill can be used to ease the angle of the beginning spiral.
Many illustrations imply that igloo construction follows the rules for masonry. I have seen a lot of illustrations which imply blocks are of a standard size and shape. When building with snow blocks, each block is shaped after it is cut from the quarry. The shape of an individual block depends on the position in the spiral where it will be placed. Near the floor, where the block may not be angled inward more than a few degrees, blocks are rectangular in shape. Near the center of the roof, where the blocks are nearly horizontal, their shape may be nearly triangular.
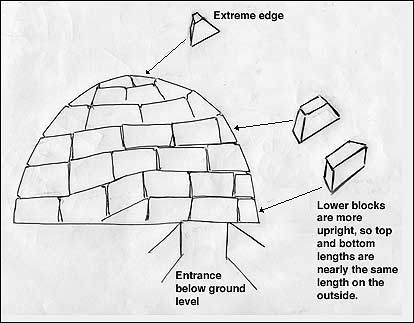
I've seldom read descriptions of the angle cut into each block. Imagine yourself at the center of a pie, cutting pie shapes into the crust of the pie (i.e. the snow blocks). The pie shape is applied both to the upright and horizontal angles of a rectangular block.
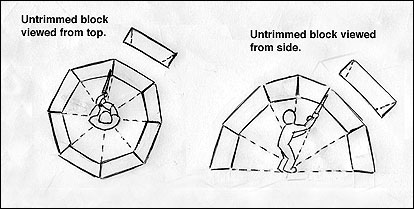
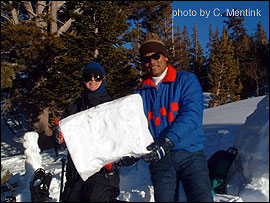
All of this makes intuitive sense. But the next bit of advice is not intuitive, at least not unless you have intimate ties to the nature of snow. Cut out an arc on the bottom of every block such that only the two bottom edges of the block will rest on the block below.
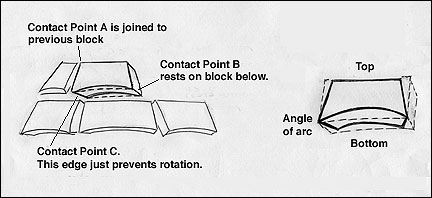
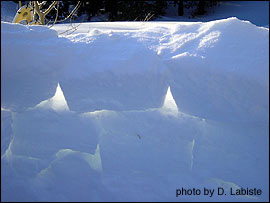 The block is now ready to seat. Hold the new block at the appropriate angle for its place in the structure. Now GENTLY slide it into the previous block. Properly set, it will make a gentle "thunk". (A lack of restraint will knock the others loose.) The compression of that gentle bump will make it "stick" to the previous block. This stickiness is what makes it possible to set blocks at extreme angles as the igloo is built. The reason for the arching bottom of the block has to do with the contact points illustrated above. Beyond that, you will need to ask an expert. I just know a block fitted perfectly to the one below is very hard to seat. Perhaps the smaller contact points direct the compressive force more effectively, melting and refreezing the blocks as they are set. Maybe one of our readers can explain the physics better.
Now, I have made this all sound very exact. In practice, blocks can be of various sizes and shapes as long as they are cut to similar heights, the upper lengths narrow, and the underside of each block is arched.
The final blocks must usually be set from the inside. The last is tilted on end, then turned and brought down into place like the lid on a Jack-O-Lantern.
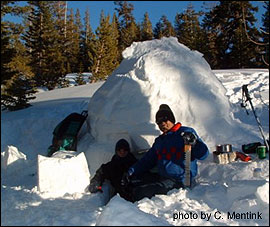
After the final block is set, shovel snow onto the igloo. Gently pack it into holes and crevices. Avoid applying pressure from the inside while filling cracks. Protruding edges may be carefully trimmed on the inside surface. A smooth inner surface prevents dripping as the inside temperature rises above freezing. After a night or two of warming from the inside and refreezing the igloo will be very strong. I stood on top of the one we built on day three.
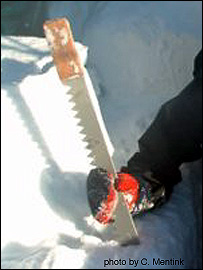
Close-up of snow saw.
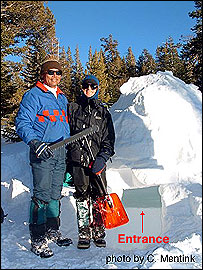
The entry is often most easily done after the blocks are all set. At least it is easy if there is more than one of you. Having set the last block, someone is now inside the closed igloo. They can take a rest while the others cut an entrance down slope from the edge of the igloo. The top of the entry is ideally at the floor level, so one climbs up onto the floor upon entering. This provides a nice heat trap. Open a vent high on the side of the igloo wall to vent carbon dioxide, especially if you are cooking inside.
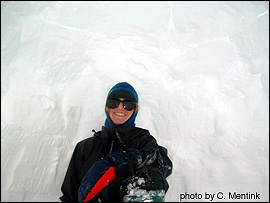
Inside of the igloo: Notice the cut blocks of packed snow that were used to create the shape of the igloo.
When it is time to abandon your igloo, consider the visual impact of this man-made structure in the wild. Consider dismantling it in an effort to "leave no trace". In some areas, deconstruction is mandatory. In our case, we had a good time hacking and sawing it into new shapes, then delivering the "coup de gráce" with flourish.
Tags:
Replies to This Discussion
-
Permalink Reply by Misteri on June 17, 2013 at 2:45pm
-
This is very good information to have. Just be sure to have a snow saw handy.
-
-
Permalink Reply by Cryptocurrency on June 25, 2013 at 3:23pm
-
I thought so. I think I'll share this one with the network come to think of it.
-
"Destroying the New World Order"
THANK YOU FOR SUPPORTING THE SITE!
Latest Activity
- Top News
- ·
- Everything
how to doanload mp3 online?
Another incredibly Stupid!! What, no mirrors?
Another incredibly Stupid!! What, no mirrors?
YouTube Downloader Tools You Never Knew Existed
Experimenter - Official Trailer
How Did the Soviets First Discover the SR-71 Blackbird?
The Farmer vs the Billionaire — Jeremy Clarkson Says NO to Bill Gates’ £100 Million Deal | UK News
The Forbidden Canyon and It’s Residents
G_LrzqtXMAAhT7w
Disgraced Former CNN Anchor Don Lemon Arrested
The Illusion of Fuck You Money
© 2026 Created by truth.
Powered by
![]()